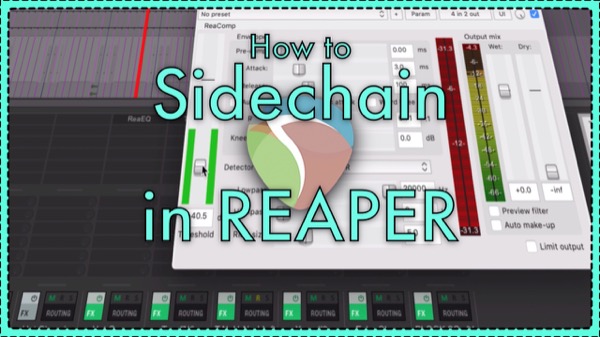
What is sidechaining?
Sidechaining is when you have a signal’s processing being triggered by another source, instead of it’s own.
For example: every time the kick hits the bass gets compressed; the synth pad gate opens with every hihat hit.
In this video you’ll see 3 ways to set up sidechaining (compression and gating) plus a bunch of other little tips for REAPER.
Manual setup
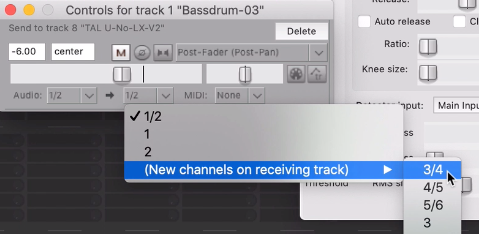
1 – Insert ReaComp plugin on track A
2 – Make a send from track B to A
3 – Set send output channels to 3/4 (new channels on receiving track)
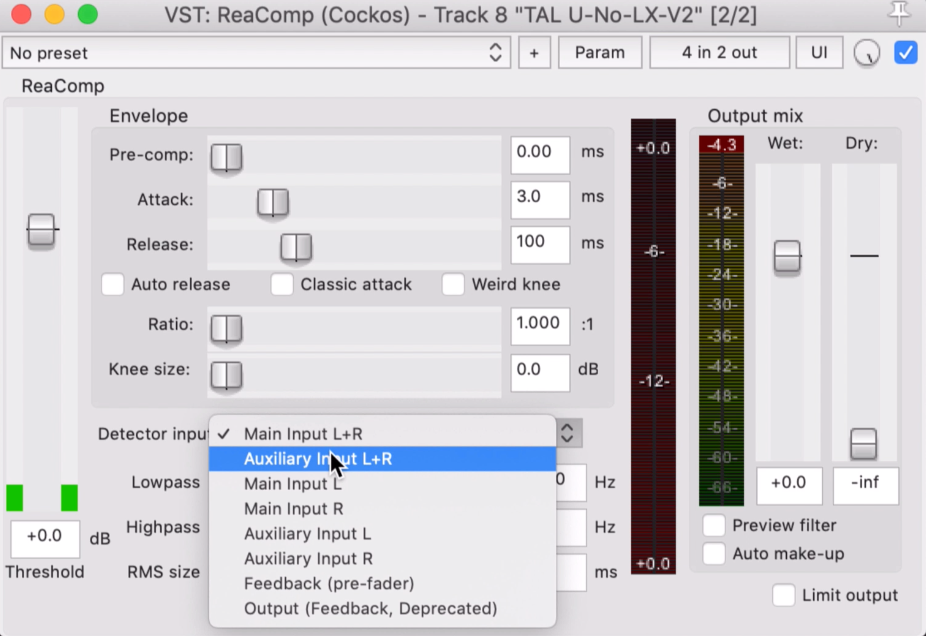
4 – Set ReaComp Detector input to Auxiliary
Quick setup by dragging onto the plugin
1 – Insert ReaComp on track A
2 – Drag from the routing button of track B and drop onto the plugin
3 – Set Reacomp to Auxiliary input
Note – this method also works with 3rd party fx. Any fx with 4 inputs should allow this. Click here for a tutorial on sidechain compression with 3rd party fx.
Instant setup with a script
1 – Assign a keyboard shortcut to Script: mpl_Create ReaComp sidechain routing.lua
2 – Select Track B (sidechain trigger)
3 – hover mouse over Track A (track to compress)
4 – Hit your shortcut key
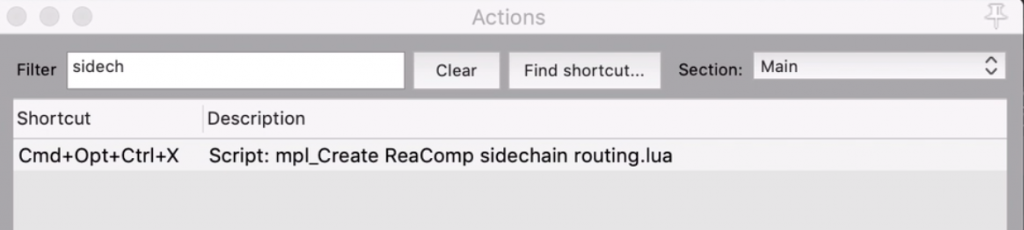
Script: mpl_Create ReaComp sidechain routing.lua comes with the ReaPack extension
Comments
3 responses to “How To Sidechain In REAPER”
hi. I’m so interesting with this tutorial. but I am a visually impaired reaper user. and I have manage to do routing channel thing. but i still cant get it works. it goes reverse instead. I mean the synth will going louder when the kick hit. could you tell me or help me with this. really aprishiated. Thanks in advance
New Reaper user here (ProTools long time user). I could be way off on this, but maybe you have the compressor on the wrong track? Like instead of compressing your synth, the kick is getting compressed.
Thanks for these clear instructions. I’m stuck on the last step though. When I set the Reacomp to auxiliary input I can no longer hear the signal of that track.
So, I insert Reacomp onto track A (bass). Make a send from track B (kick) to track A (bass) and select 3/4 output. Then I go into Reacomp and select auxiliary input but, when it switches to this input I can no longer hear the bass (track A), only track B (kick).
Any ideas on this? Is there a step I’m missing? As far as I can tell all my other settings are the same as on the video tutorial. It happens when I use the drag and drop method as well.